User Management⚓︎
This document describes how you can manage users and their roles within the prokube platform.
Admin Console⚓︎
Warning
Identity and Access Management are highly security-relevant and must be accessed with a trusted TLS certificate. Check the maintain section for further information.
The admin console is exposed under the https://{DOMAIN}/auth/admin/prokube/console path. Use
the credentials provided by a prokube master admin to login. See Initial Setup for details.
Create a User⚓︎
Probably the most common task in Keycloak is to onboard a new user to the prokube platform.
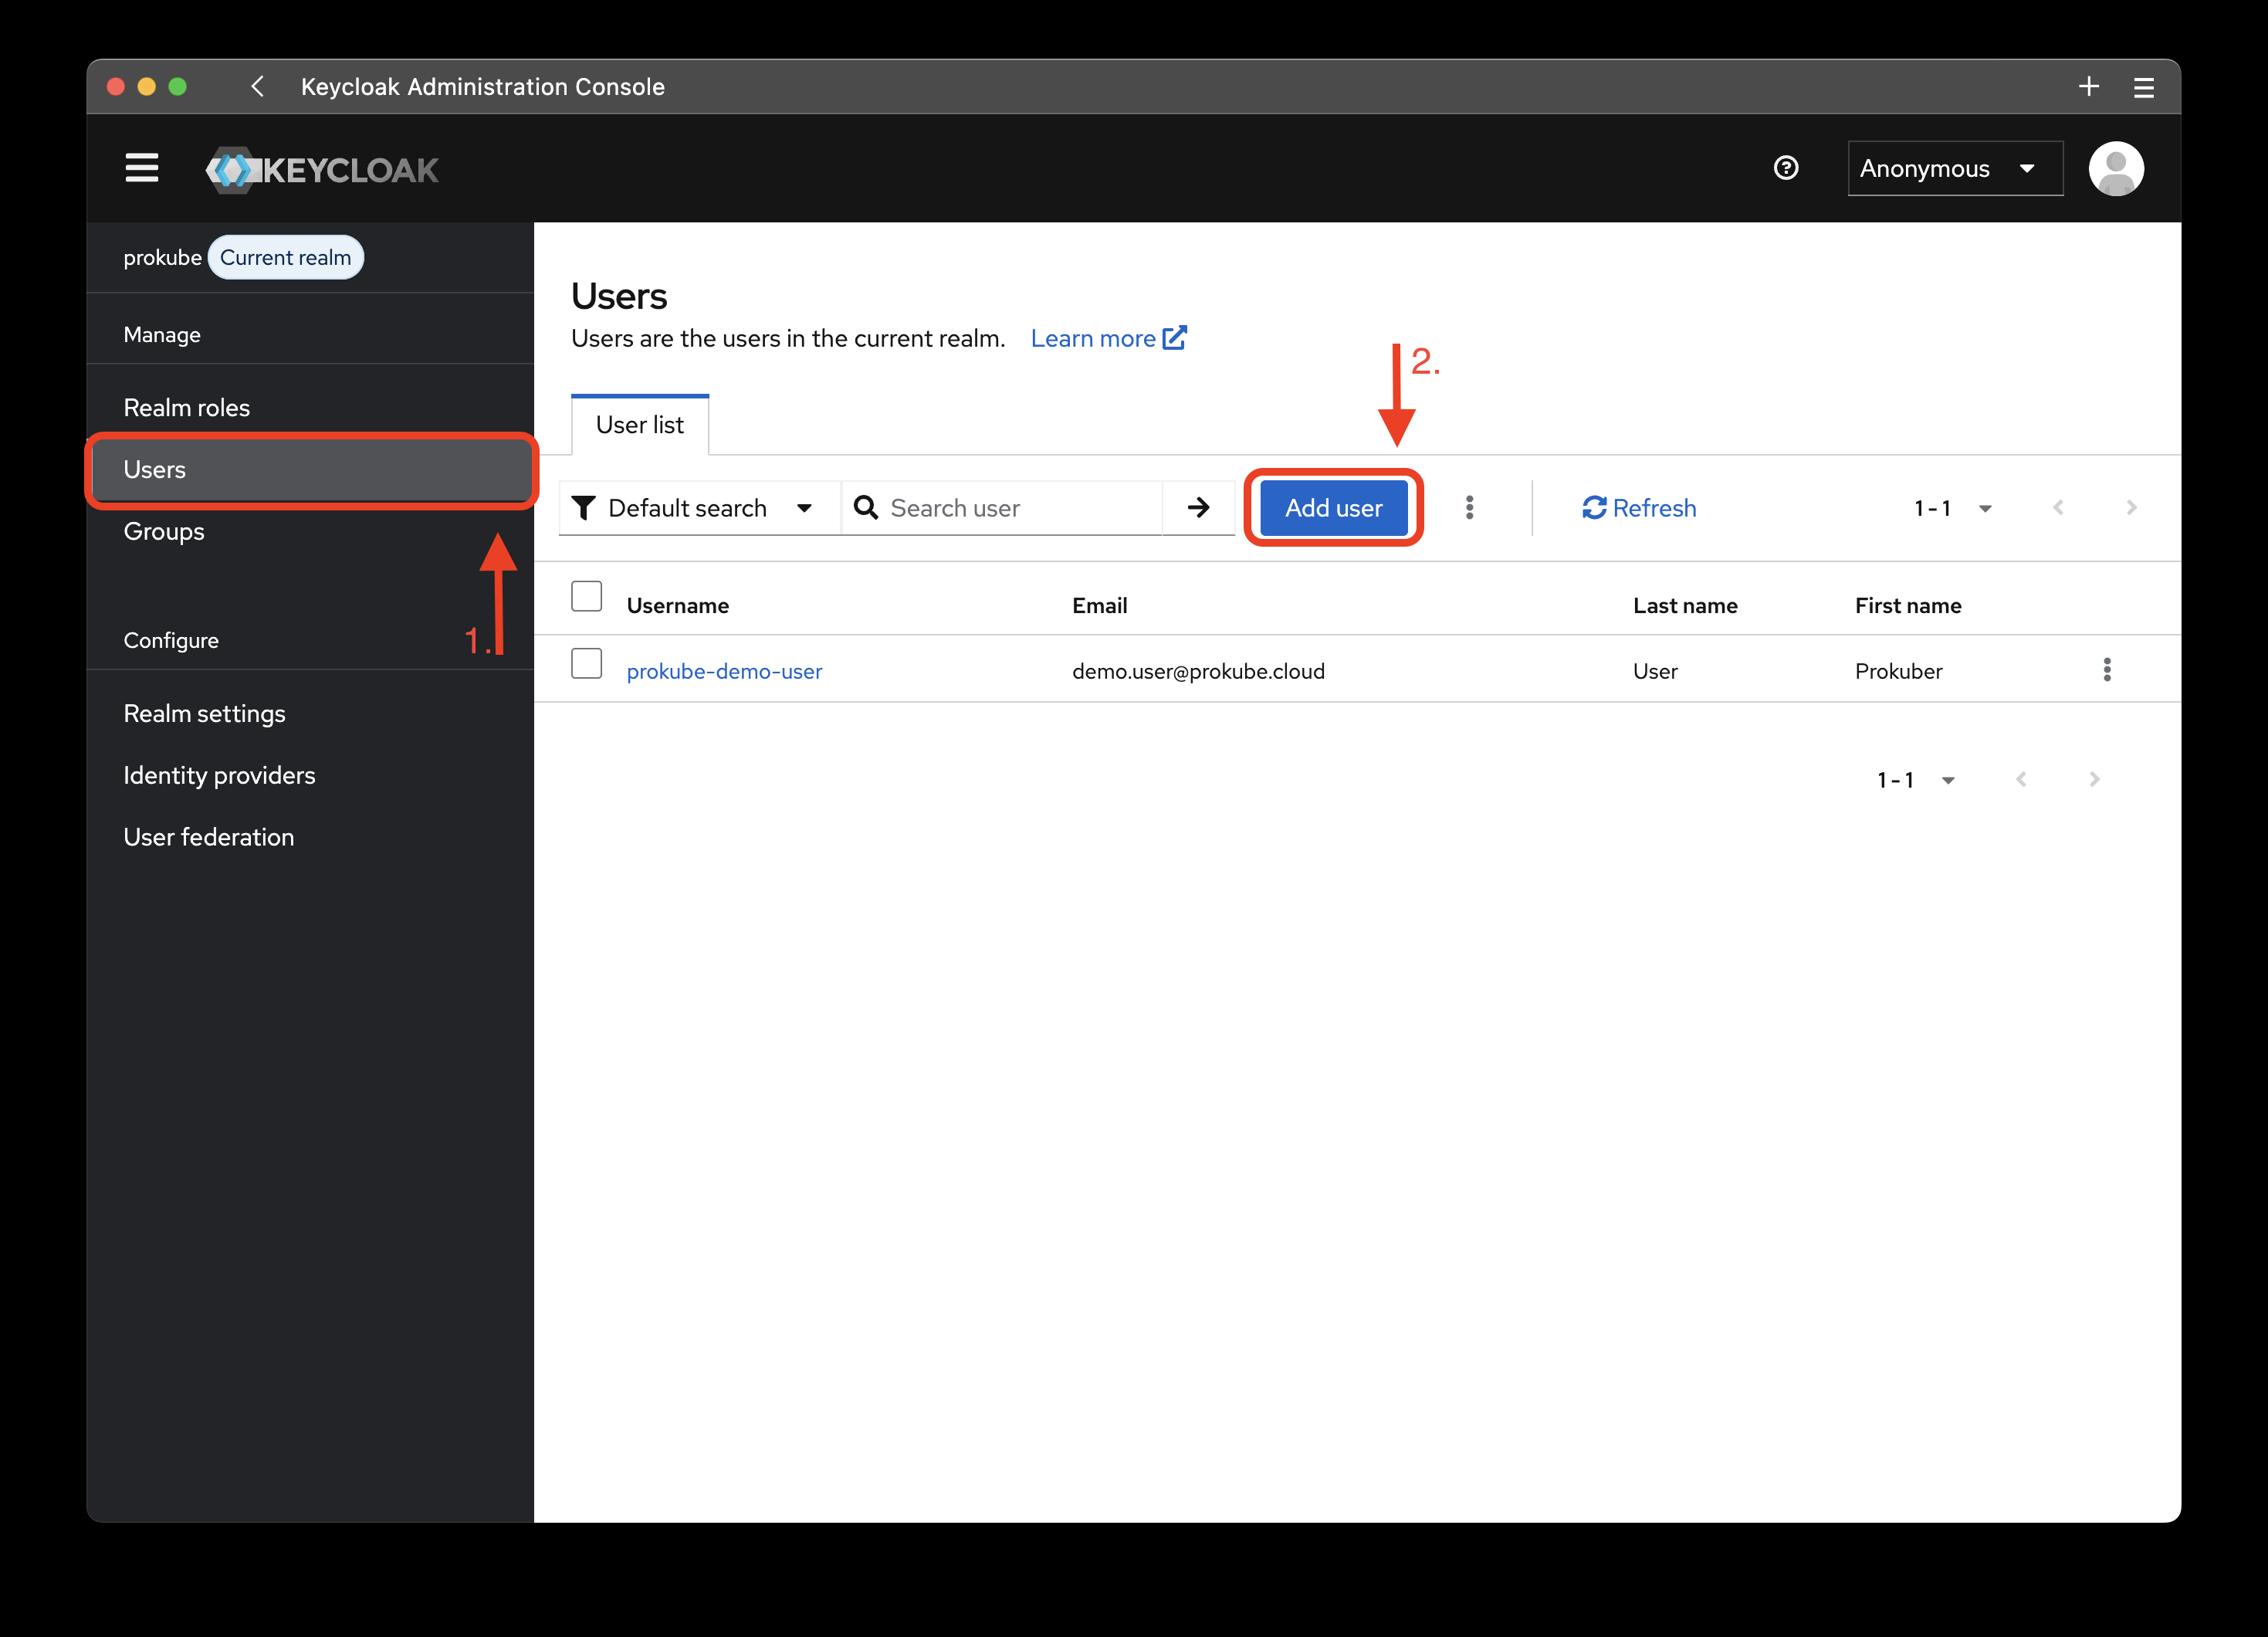
Click on the add user button, and configure the new user as follows:
- Add all required user actions.
- To enforce 2FA, add the
Configure OTPlabel.
- To enforce 2FA, add the
- The user must have a verified email address in order to login.
- If emails are not yet configured in the realm settings, click the Email verified switch.
- Create temporary credentials for the user.
Update a User⚓︎
You can reset user credentials or grant them privileges all within the User details page. To get there:
- Open the Users tab.
- Click on the user you want to edit.
Reset Credentials⚓︎
There are two ways to reset user credentials. The admin can either create new temporary credentials or they can send a reset credentials email, which allows the user to reset their password for a limited amount of time.
First, open the Credentials tab, then you have two options.
- Click on "Reset password" to create a new password. Make sure to create a temporary password, so that the user has to set up their own on the first login.
- Click on "Credential reset" and define the time-to-live for the password reset link.
Note
The "Credential reset" function requires a properly set up email connector. Take a look at the Keycloak Documentation for instructions on how to set it up.
Grant admin privileges⚓︎
Add the user to the group pk-admin.
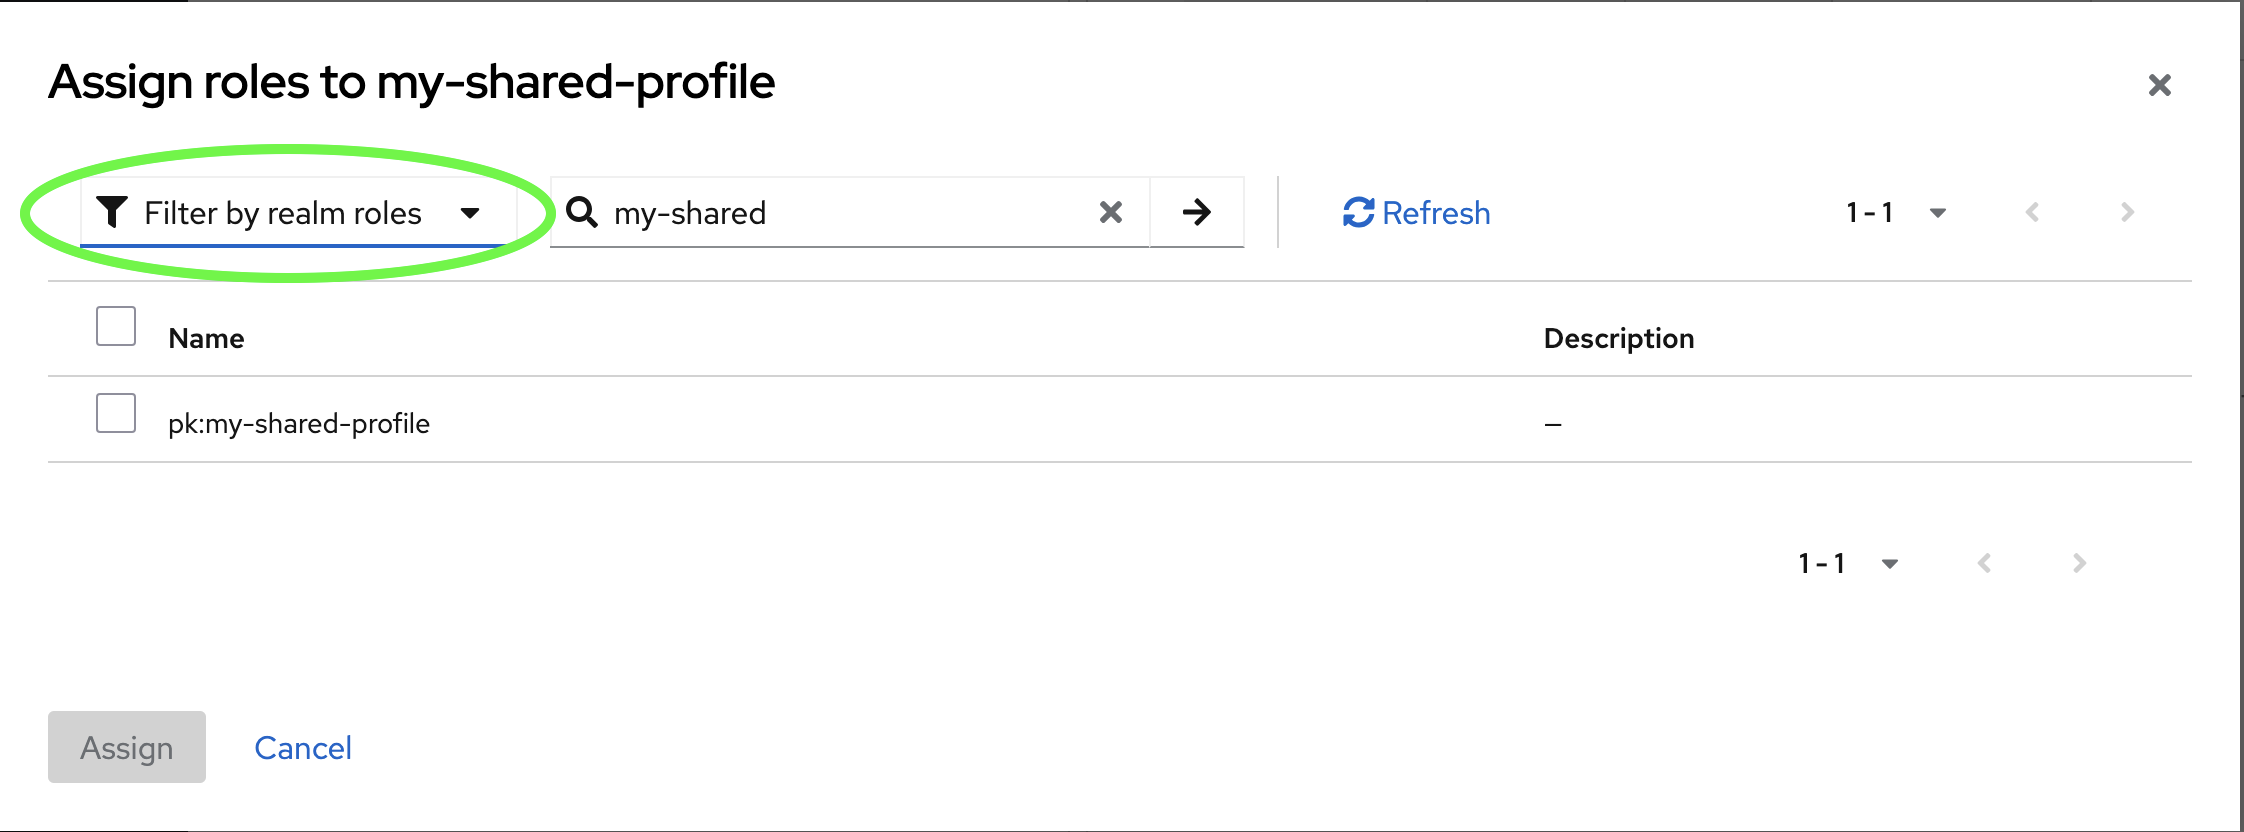
Grant access to a workspace (Kubeflow Profile)⚓︎
Use a role mapping to assign the workspace's realm role to the user.
Hint
Filter by realm roles instead of clients.
Alternatively, add the user to a group which has the necessary role.
Revoke User Access to a Workspace⚓︎
To revoke access to a workspace, unassign the corresponding workspace realm role from the user.
When using group-based role assignment, delete the user from the group. Alternatively, delete the group to revoke the permission from all members. If the members have roles assigned directly (not through a group), those role assignments will remain after group deletion.
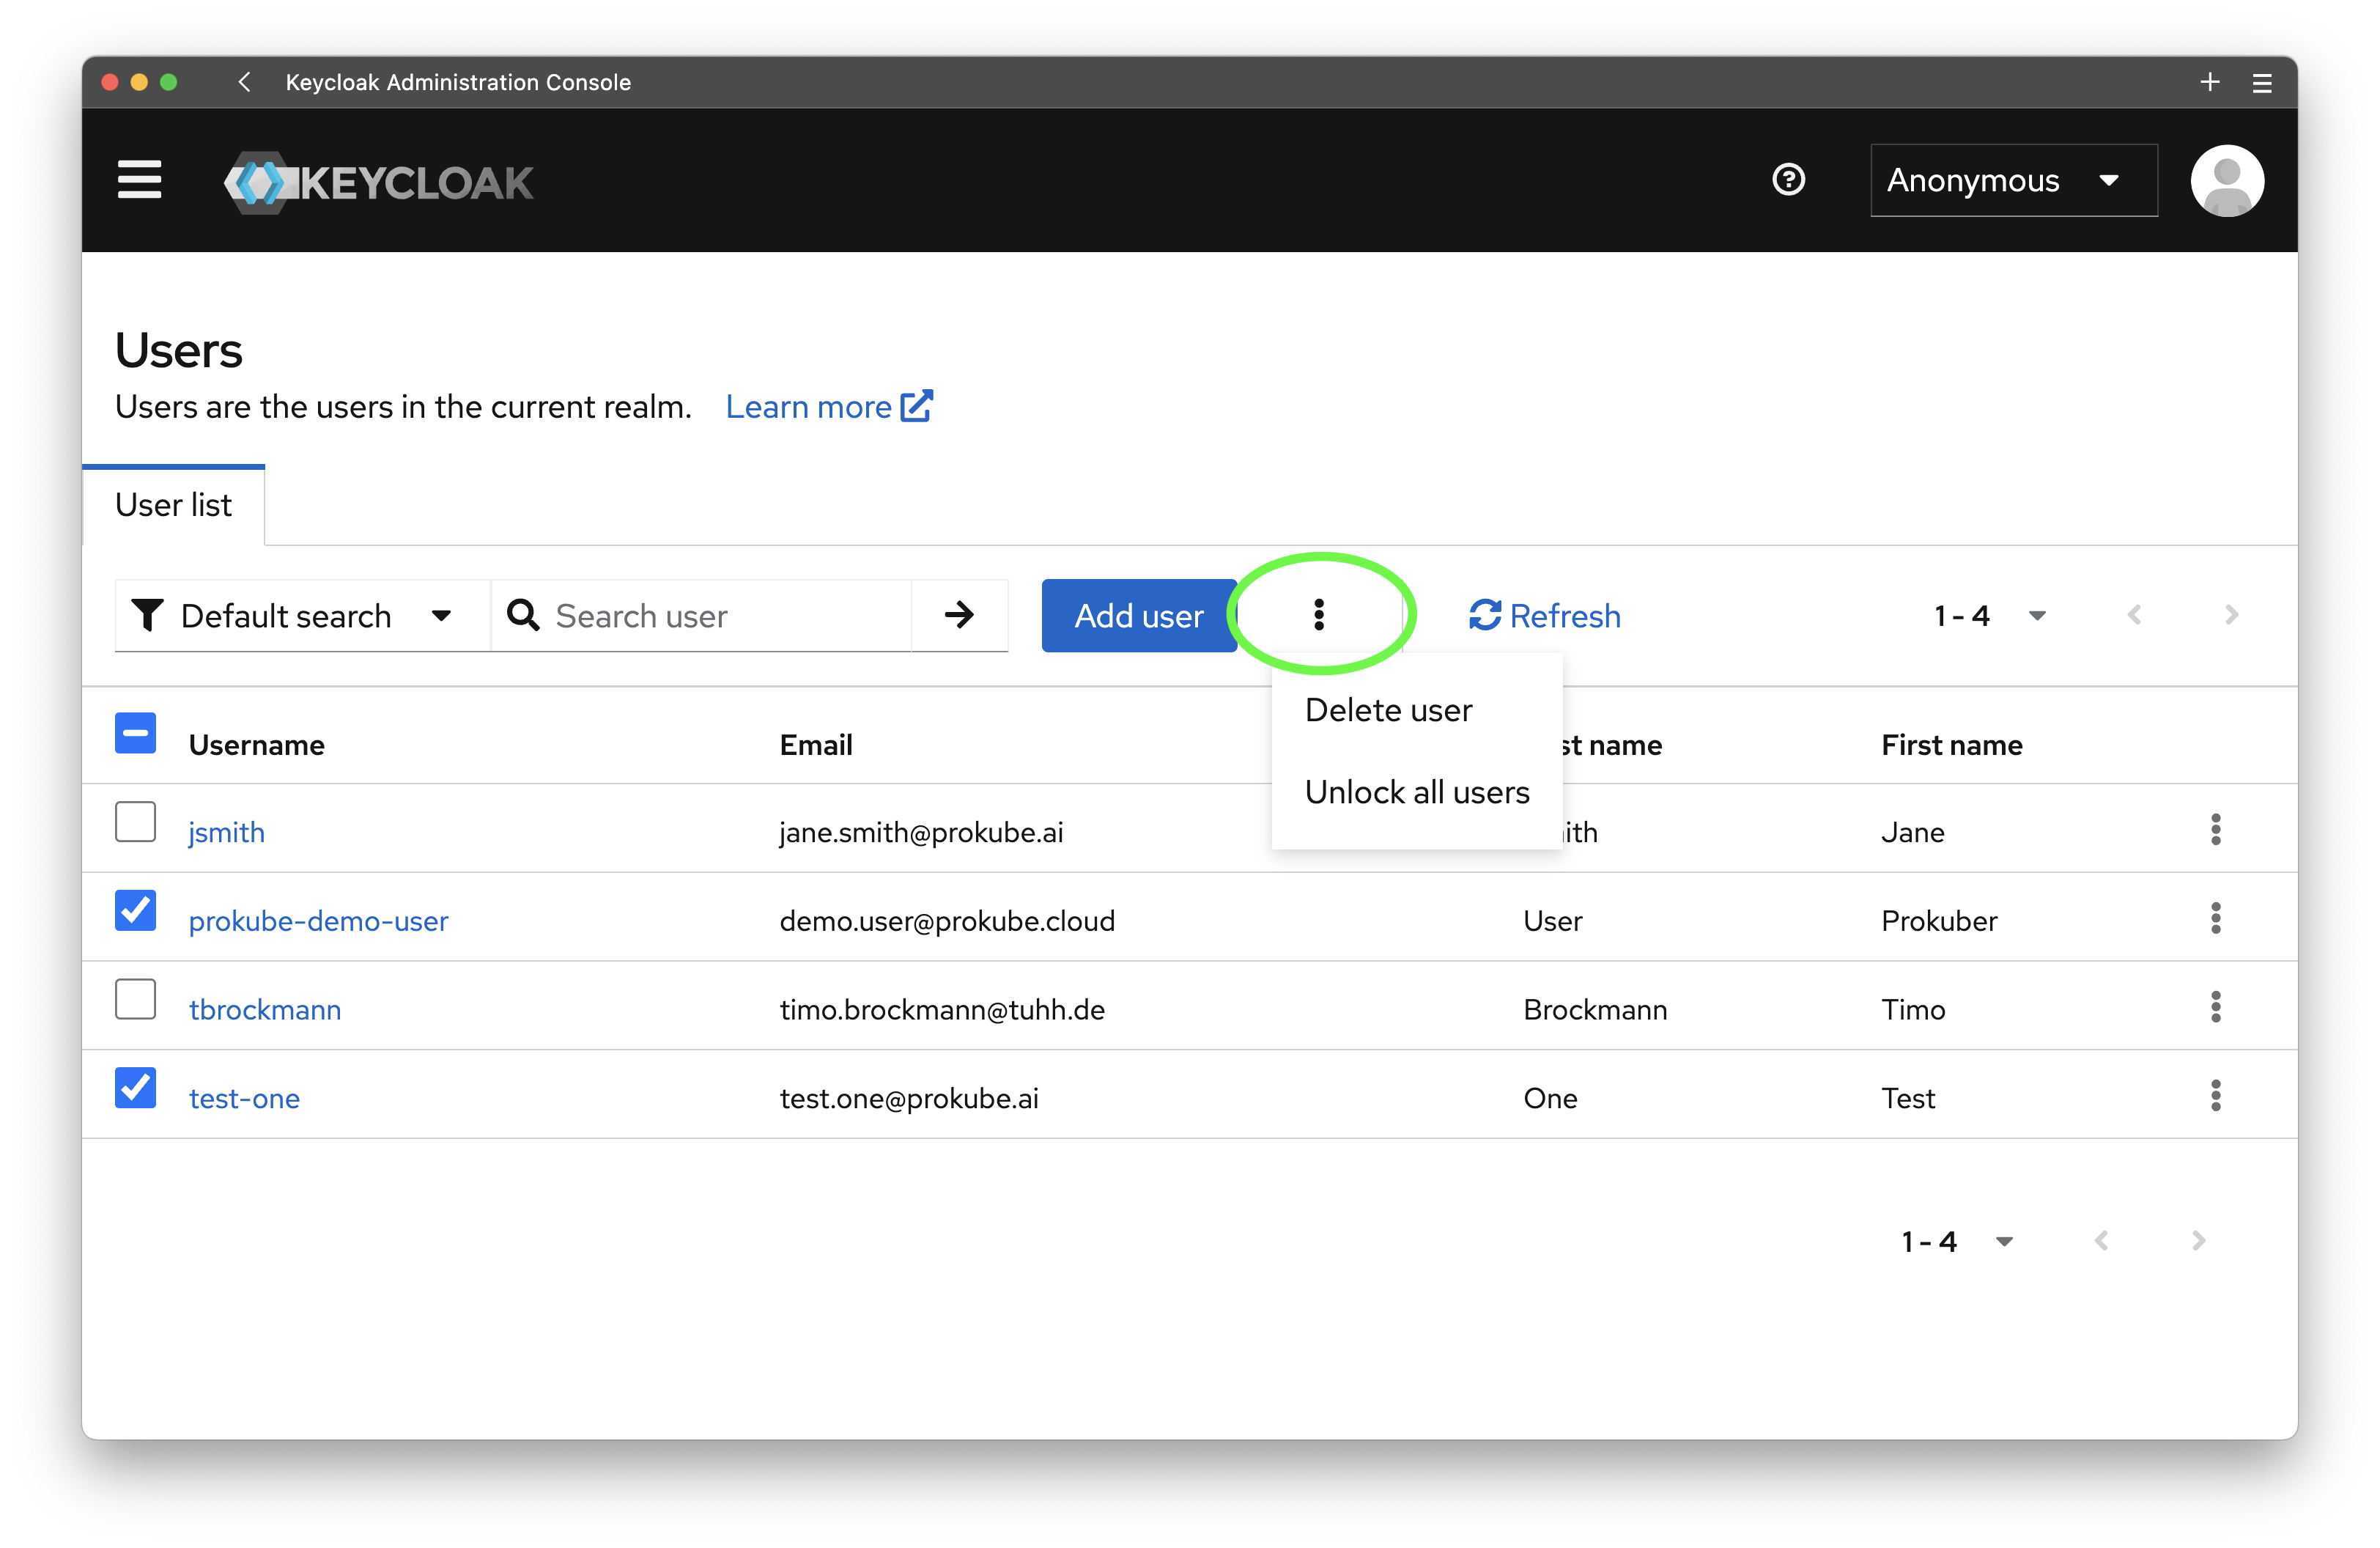
Delete a User⚓︎
Open the Users tab and select all users you want to delete. Then click on the more
options menu, highlighted below, and click on "Delete users".
What happens to user data
When a user is deleted, the platform automatically handles cleanup of their resources:
- MinIO credentials are revoked: The user's S3 service account and access policies are removed
- MinIO buckets are archived: The user's buckets (
{username}-mlpipelineand{username}-data) are preserved but access is revoked - Kubernetes resources are permanently deleted: Namespaces, volumes, secrets, custom resources, and other user-specific Kubernetes objects are removed and cannot be recovered
- Pipeline run history is preserved: Information about pipeline runs remains in the Kubeflow Pipelines database
MinIO data is archived rather than deleted to prevent accidental data loss. To permanently delete a user's S3 data, an administrator must manually delete the archived buckets through the MinIO console.
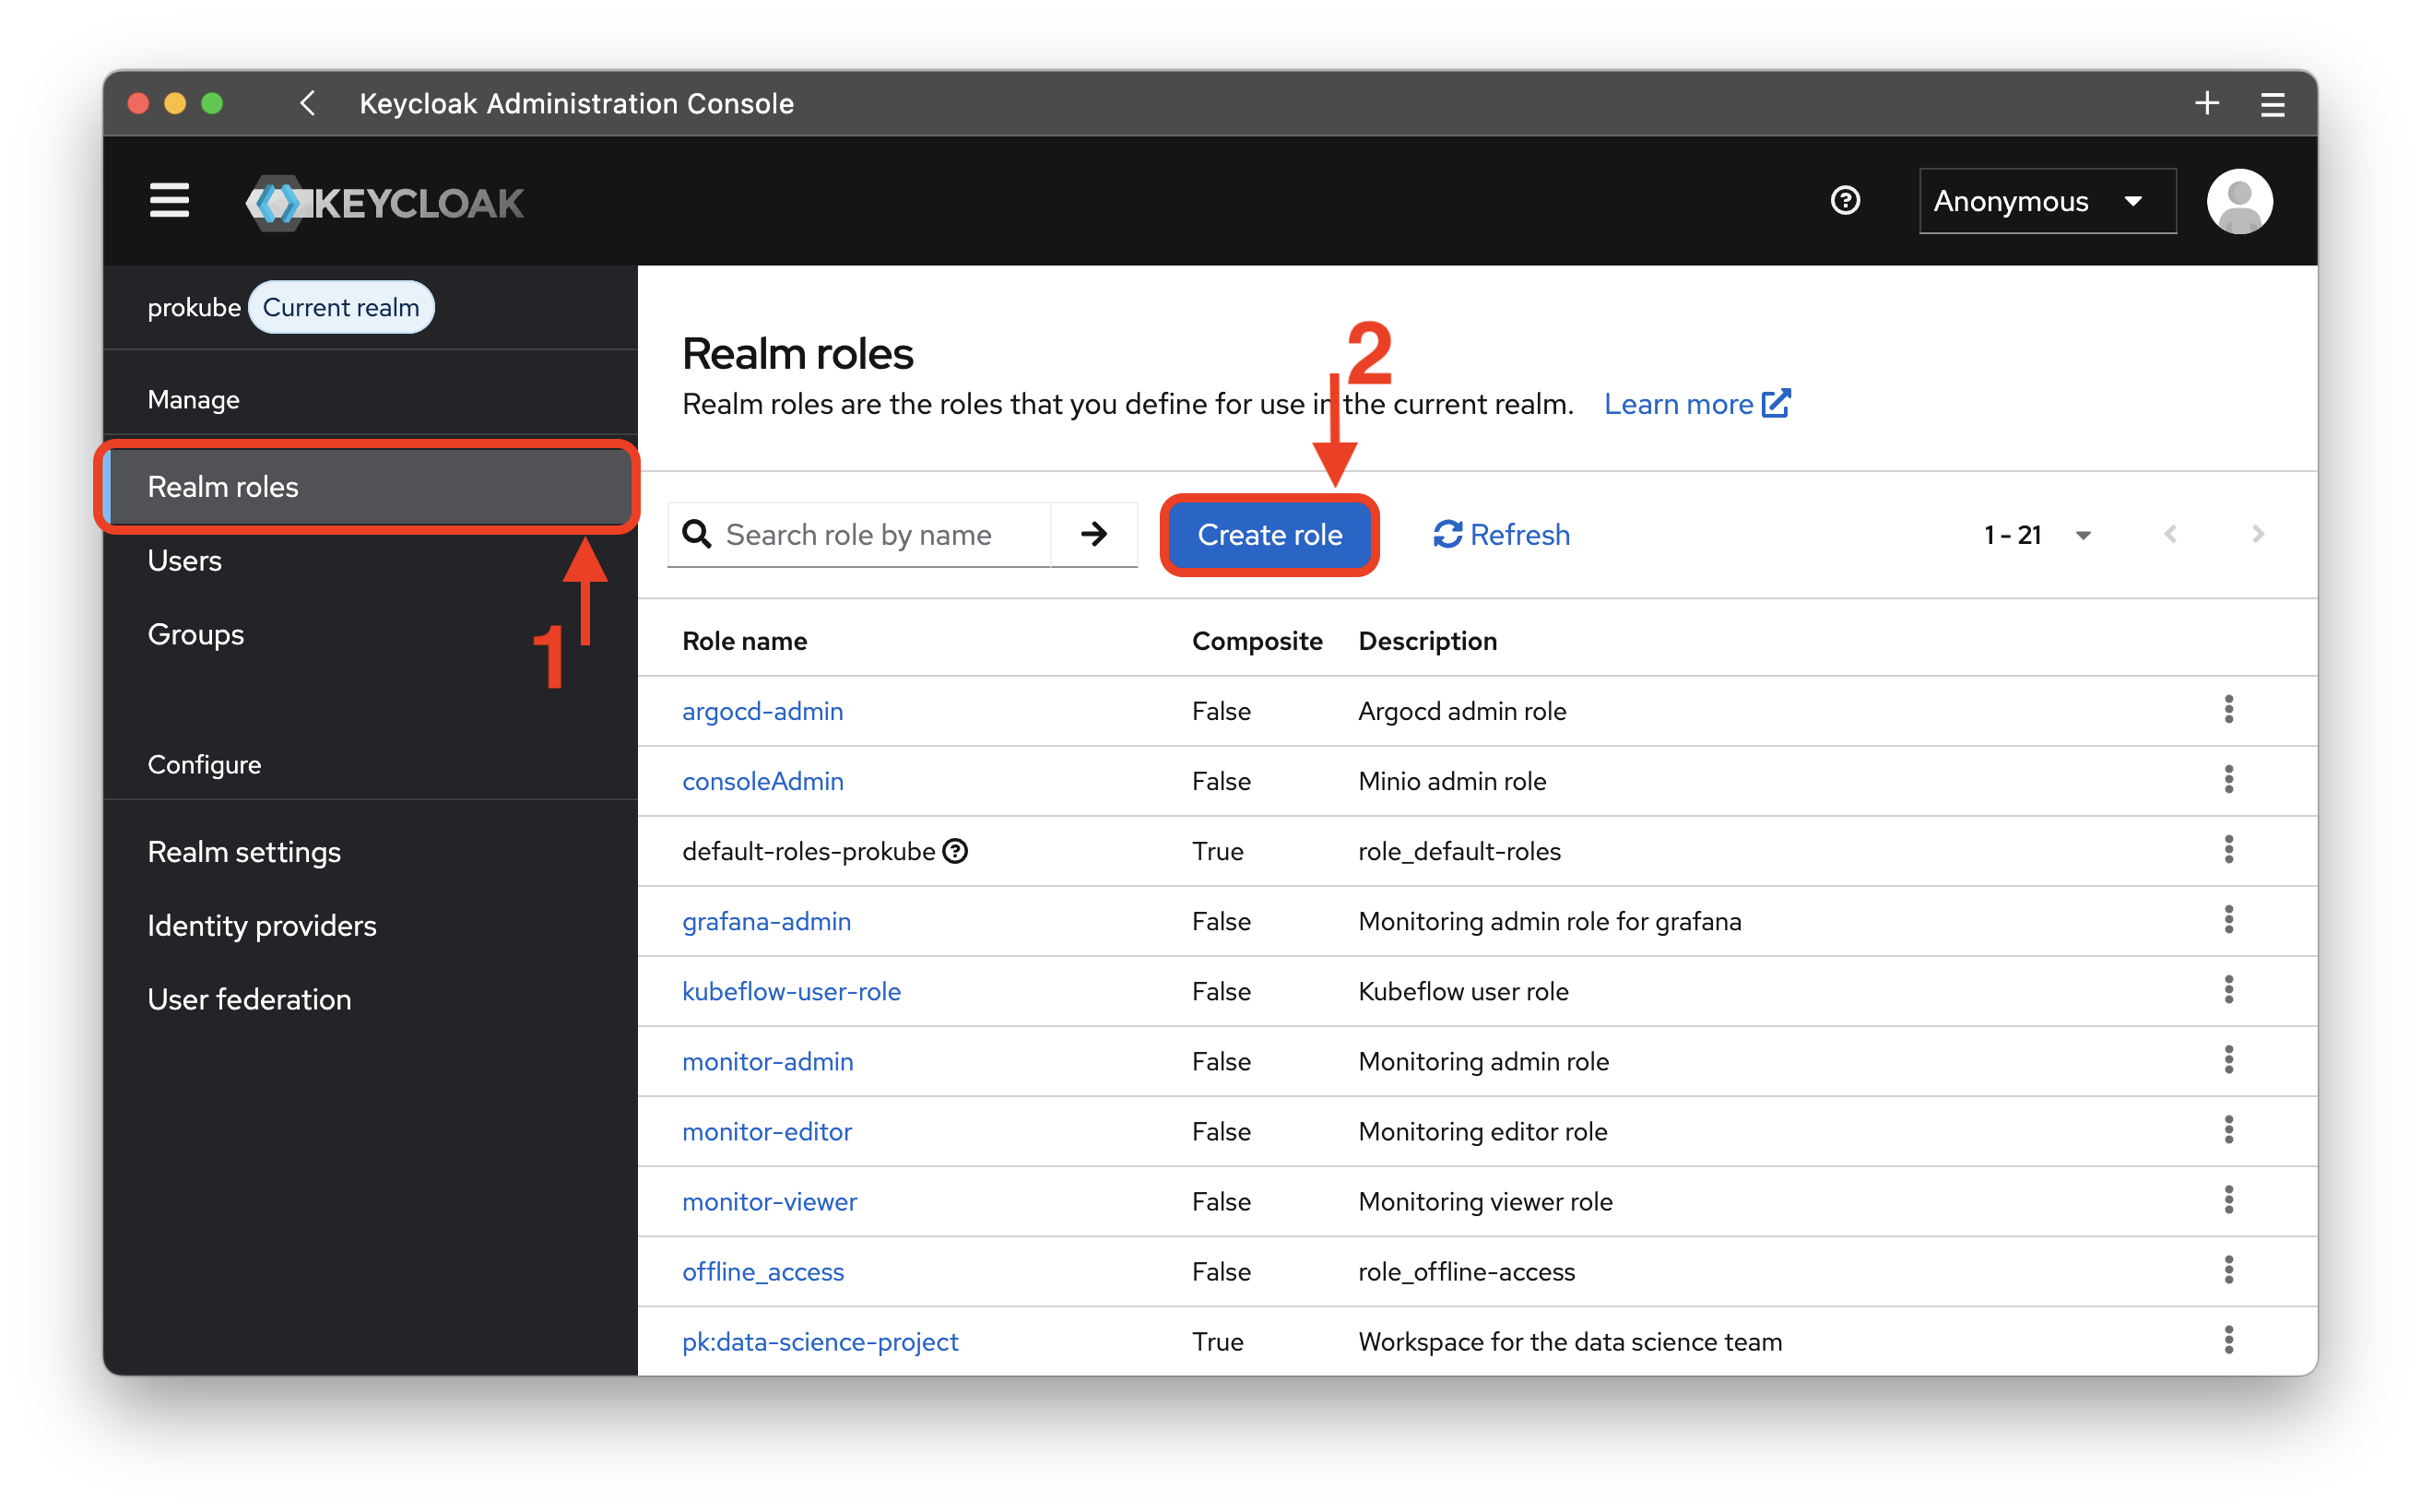
Create Realm Role⚓︎
Warning
Realm roles are tied to privileges throughout the cluster. Please assign them with care! For further insights take a look at the IAM Access Management page.
- Open the Realm roles tab
- Click on
Create rolebutton and fill in the role name and description.
For maintainability reasons prokube recommends using a prefix to differentiate between
different privileges. prokube itself uses the pk: prefix to indicate that
this role is tied to a workspace and managed by the prokube platform. For MinIO we suggest
the s3: prefix.
Delete Realm Role⚓︎
Click on the Realm roles tab. For each role you can now click on the options' menu at the right and delete the role.
Hint
The Realm roles overview is using pages to organize the realm roles. If you can not find a role you are expecting, check whether it is on another page or increase the number of entries for each page.
Workspaces⚓︎
Create Workspace⚓︎
- Navigate to Realm roles in the Keycloak admin console (accessible under
/auth/admin/prokube/console) - Click
Create roleand name itpk:<workspace-name>(e.g.,pk:data-science-team) - Add a description and save
The platform automatically creates all required cluster resources for users assigned to this role.
Note
Every user assigned to this role has editor privileges within the workspace.
Delete Workspace⚓︎
Delete the corresponding realm role. Contributor resources for users assigned to this role will not update immediately, but their access will be automatically revoked. No additional manual steps are required; the system will update user permissions upon the next trigger event.
What happens to workspace data
When a workspace is deleted:
- User access is revoked: All users lose access to the workspace namespace and resources
- MinIO buckets are archived: Workspace-related buckets are preserved but access is revoked
- Kubernetes resources are permanently deleted: The workspace namespace, volumes, custom resources, and all contained objects are removed and cannot be recovered
- Pipeline run history is preserved: Information about pipeline runs remains in the Kubeflow Pipelines database
MinIO data is archived rather than permanently deleted. To reclaim storage, an administrator must manually delete the archived buckets through the MinIO console.
External User Management⚓︎
User federation⚓︎
Keycloak offers support for external databases/directories, like LDAP and Active Directory. Learn more
Connect to OpenID/OAuth Identity providers⚓︎
You can natively integrate other OIDC, OAuth2, or SAML Identity Providers. For further documentation on the different options, consider the Keycloak Docs. Learn more
Once a user logs in, they have to set all user attributes that are required for a Keycloak user account. These mandatory attributes, as well as things like 2FA and validating email addresses, can be configured in the authentication flow.
Regardless of your identity provider, your configuration must ensure the following to work with the prokube platform:
- Users must be part of the
pk-usergroup. - Users are required to have a verified email address.